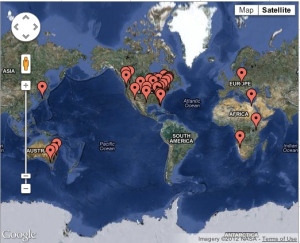
 So yesterday I tried something new. I wanted my digital literacy students to see the reach of social media. I was introducing them to blogs and what they are and how they have evolved. I was also mentioning how blogs can be a way to highlight talents, promote conversation and to reflect.
I started with a simple blog post.
Everyone…
I want my students to see the power, purpose and relevancy of blogging. Please share one sentence describing “why do you blog?” Thank you.
Please fill out the form below.
I then logged into my Google Apps account. Selected Create > Form and made four simple questions:
1. Name (optional)
2. Twitter name (optional)
3. City, Country
4. Why do you blog?
I selected embed from the forms editing panel in the upper right-hand corner, copied the code, and pasted it in the HTML box of my blog. Before I hit publish, I went back into my Google Drive, found the spreadsheet where my answers were going to be collected. I selected “Insert” > “Gadgets” (pop up window came up) > and then selected “Maps” > Found “Map by Google” > and selected add to spreadsheet.
The video below will help you see how to get a project started using Google Forms and Maps. NOTE: You must have a column that includes some form of address. You can keep it simple and use City and Country or you can solicit full addresses. Depending on the project, you can choose accordingly. Any questions about using this type of project in your classes, as always, see the help desk.
